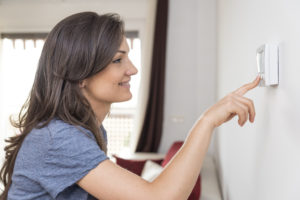
 Is it time to finally replace that thermostat? The good news is that it’s fairly easy to do it yourself. No doubt you want to switch it out because you’re interested in turning your house into a “smart home.” This trend is great for many reasons, but basically, what could be more satisfying than to combine the heating, cooling, electrical, and lighting systems into one?
If you’re ready to go, then follow these simple steps to get the job done right:
- Shut Down: Begin be shutting down the power to the A/C and furnace. Simply go to your breaker box and flip off the switches associated with these functions. If you want an even easier option, flip off the power switch on the units.
- Take Off Face of Thermostat: The next step is easy. Simply take off the face on your current thermostat. There are no special tools needed for this.
- Snap a Photo of the Wires: This is not for the sake of memories, but it’s so you can be reminded of which colored wires are plugged into where. You don’t have to do this, but you might be glad that you did.
- Disconnect Wires: Take the time to disconnect all the wires from the old thermostat. There’s a chance that you might need a small screwdriver to do this because there are screws holding the wires in place. Folks often find that using the screwdriver that is used for eyeglasses is helpful.
- Remove the Mount: Now, remove the old mount and make room for your future system.
- Mount the New Thermostat: Now, mount the new thermostat where the old one used to be and reconnect the wires in the same way that they were before. Even though you took a picture of the wires, there’s still a handy marking system that will distinguish colors. You should see “R”, “G” and so on.
- Add the Faceplate: Once the mount is up and the wires are in, it’s time to screw the faceplate on. Drywall anchors might be necessary to securely screw the faceplate mount.
- Attach Thermostat Face + Turn A/C and Furnace Back On: This is self-explanatory.
- Configure the Thermostat: Keep in mind that every thermostat is configured differently. Be sure to follow the steps that are provided in your user’s manual. Take advantage of the “Home” and “Away” features, as well as the cool “Geofence” feature which informs the system when your smartphone leaves the house.
You’re all ready to go! Enjoy your new smart home, and never apologize again for forgetting to turn the lights off.

